Installation
I could go into extreme detail,
but luckily for me Everglide has some excellent pictures at their site that
explain the installation process perfectly. A simple breakdown goes something
like this:
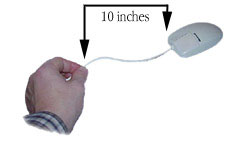
1. Once you determine how much free
wire you need
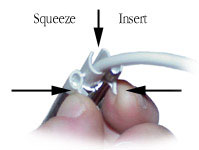
2. Insert the wire into the front
of the Mouse Bungee by pinching the retaining device from below.
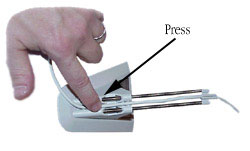
3. Continue the wire through the
bottom retainer. Go to work without your wire getting in the way.
That's it. It doesn't
take an engineering degree. Rather than just going with the recommended 10"
I think you can go with a little more slack - especially if you find that
you like to yank the mouse left and right real hard. If you don't you'll have
the Mouse Bungee flying all over your desk! For the truly radical you could
probably try super gluing the feet down.
Performance and Conclusions
After two weeks with the
Mouse Bungee on my desk I have to say that I have no plans of removing it
from my mouse. One of the main benefits I've noticed with the Mouse Bungee
is that while playing games I'm not running over my mouse cord when I make
a fast side to side movement. There must be some sort of magnetic attraction
with the wire and the ball that is inside a mouse, and the Mouse Bungee sure
does help with that problem.
The ball bearing in the
center of the unit is very important to how this thing works. It creates enough
weight in the center of the unit and that makes it very hard to knock it over
or even to get it to slide on the desk. Everglide makes some pretty cool products,
and I'd say at $14.95 people shouldn't pass up the chance to put a Mouse Bungee
on their desk.
Victor Oshiro
4 October, 2000


